
Appearance
Creating an OIDC Identity Mapping in the JFrog Platform
In order to support keyless authentication with the JFrog Platform, you will need to create identity mappings within your project. This will allow you to use your pipelines, workflows, and other automations to authenticate with the platform without requiring stored credentials.
Locate Tekton Cluster
Under the Administration tab, click on the General Management->Manage Integrations option. This will bring you to the Integrations page, where you will see a list of Tekton clusters that have been mapped to identity providers within the JFrog Platform. 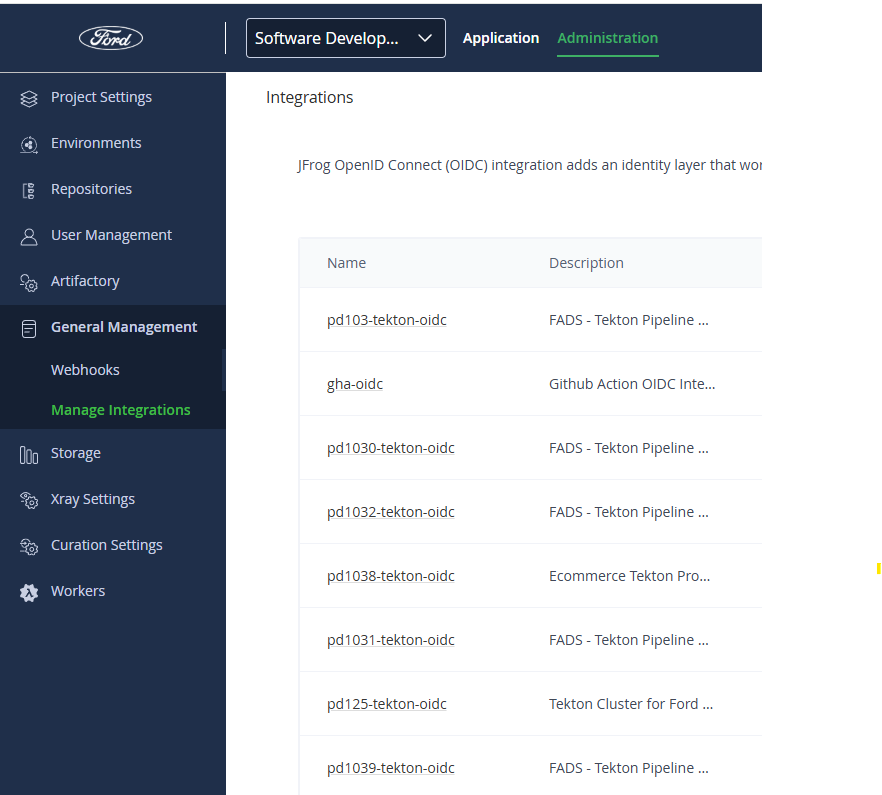
Find the Tekton cluster you want to create a mapping for and click on the + button to the right of the cluster name. This will bring you to the Identity Mappings dialog for the cluster. 
Create Identity Mapping
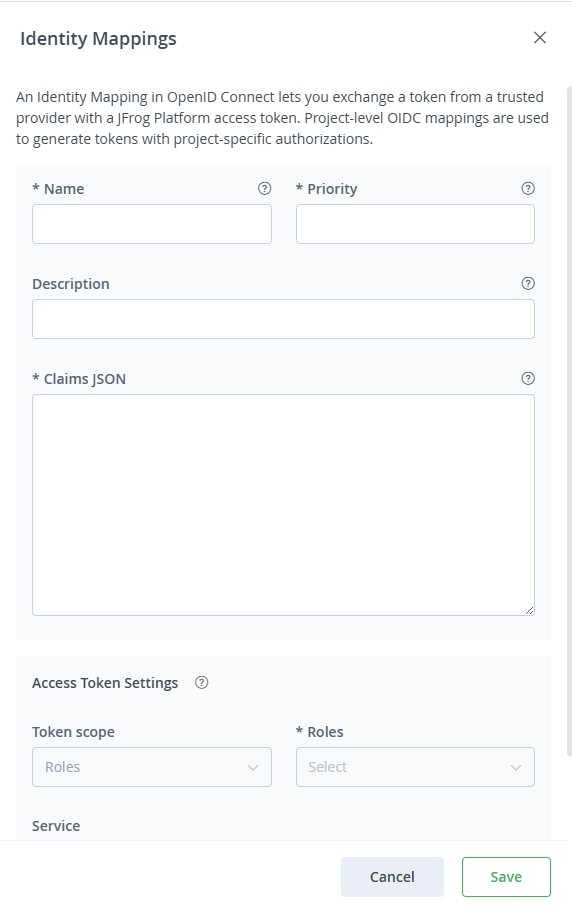
Name: Enter a name for the mapping. This can be anything you want, but it should be descriptive enough to help you identify the mapping later.
Priority: Enter a priority for the mapping. This is used to determine the order in which mappings are evaluated. Lower numbers are evaluated first.
Description: Enter a description for the mapping. This is optional.
Claims JSON: Enter the JSON object that contains the claims you want to use for the mapping. This object should contain the claims that are returned by your identity provider when a user authenticates. The claims you specify here will be used to identify the user in the JFrog Platform.
Building the Claims JSON Object
You need three pieces of information to create the claims JSON object. These are:
- Openshift Namespace
- Openshift Service Account (Usually pipeline)
- CaaS Cluster Service account issuer URL (Can be found on the CaaS Tools website. Locate your cluster and scroll to find the 'Service account issuer' field.)
Template:
json
{
  "sub": "system:serviceaccount:<OpenShift Namespace>:<OpenShift Service Account>",
  "iss": "<CaaS Cluster Service account issuer URL>"
}
Example (Creating a mapping on the pd1031 Tekton Cluster for the pipeline user of the testpipeline namespace):
json
{
  "sub": "system:serviceaccount:testpipeline:pipeline",
  "iss": "https://storage.googleapis.com/caas_ocp_gcp_1031_prod_oidc"
}
Access Token Settings
Token scope: For project identity mappings, this scope cannot be changed from Roles.
Roles: Enter the role that you want to assign to the identity mapping. This role will be used to determine the mapping's permissions within the JFrog Platform.
Service: You can limit the JFrog Platform service this mapping has access to. There is no need to change this setting for most cases. Click on the All checkbox here.
Token Expiration time(In Minutes): Enter the token expiration time in minutes. This is the amount of time the token will be valid for after it is generated. The default(and maximum limit) is 1440 minutes. Ensure that your token expiration time is greater than the period of time required to run your pipeline/workflow/automation.
After filling in all of the fields, click on Save. This will create the identity mapping for the Tekton cluster.
View/Edit Identity Mapping
From the Integrations page, you can also click on the name field of the cluster. This will bring you to the OIDC Integration page. You will be able to see the settings for the identity provider mapping. On the second half of the page, you will see Identity Mappings. There are tabs for Global and Project. Under Project you can edit and delete existing mappings, or click on the Add Identity Mapping button to create a new mapping. This functions just as above.
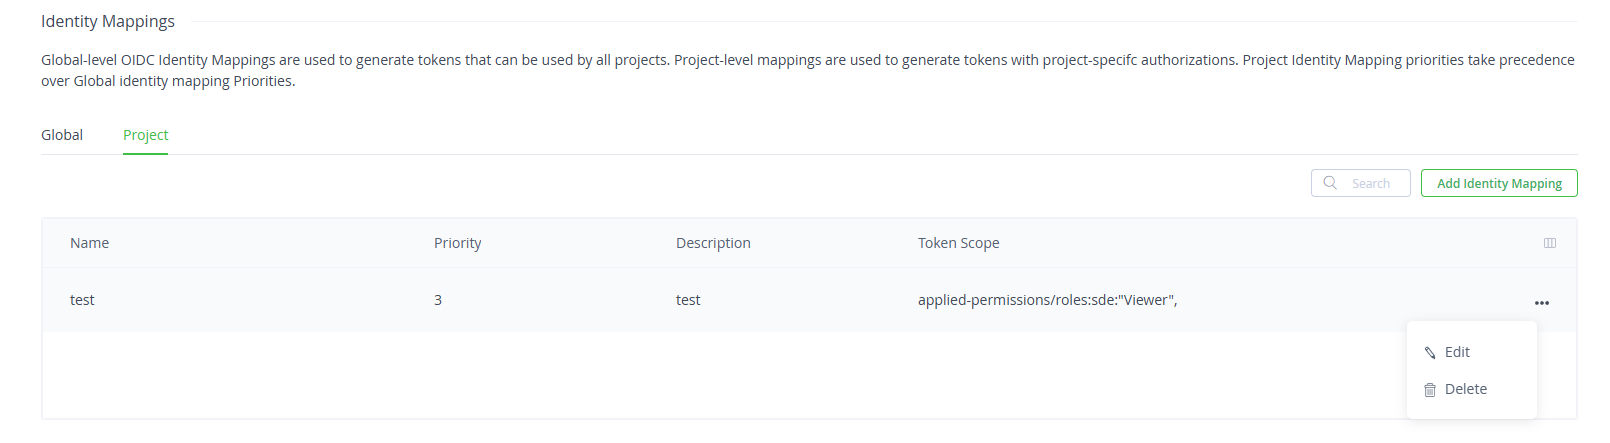
Clicking on edit will bring up the Identity Mappings dialog again. Clicking on delete will bring up the Delete Identity Mapping dialog for confirmation.