
Appearance
Identify Requirements
Before configuring your development environment, you must identify the necessary requirements to access JFrog artifacts for downloading and uploading.
Identify Permission Requirements
Determine your project's needs regarding downloading and uploading artifacts.
1. Download Public Artifacts Only
If your project only requires downloading public dependencies (e.g., Maven Central, npmjs):
- Request general access to the JFrog Platform.
- Follow the guide: General JFrog Platform Access
2. Download Private Artifacts
If your project requires downloading private dependencies (internal libraries):
- Request permission via MyAccess.
- Join the appropriate security group(s) via iam.ford.com.
- Security groups are based on the specific dependencies you need to access.
3. Publish (Upload) Artifacts
If your project requires publishing artifacts to JFrog, you must identify:
- The target Project.
- The target Repository (must be a Local repository type).
- The Security Group with
writeordeletepermissions.
For more information, see JFrog Platform Basics.
Identify Security Groups
JFrog uses a Role-Based Access Control (RBAC) model. Security groups grant specific permissions (read, write, delete) to users for specific repositories.
For more details on the permissions matrix, refer to Customize Repositories Permissions.
Creating Access Tokens
Access Tokens are required for authentication when using build tools (Gradle, npm, etc.) or CI/CD pipelines.
Steps to Generate an Identity Token
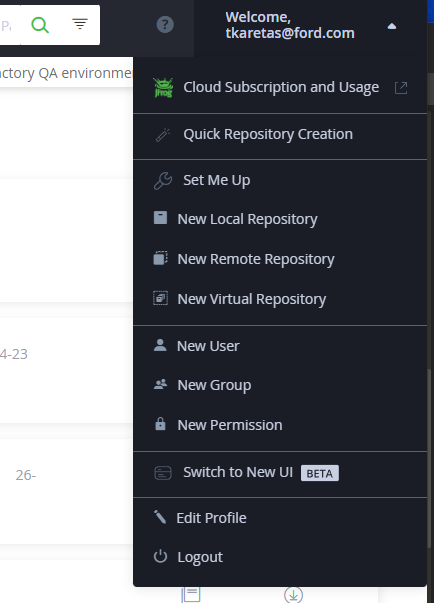
1. Access User Profile
- Log in to the JFrog Platform.
- Click your user icon (or "Welcome, email@ford.com") in the top-right corner.
- Select Edit Profile.
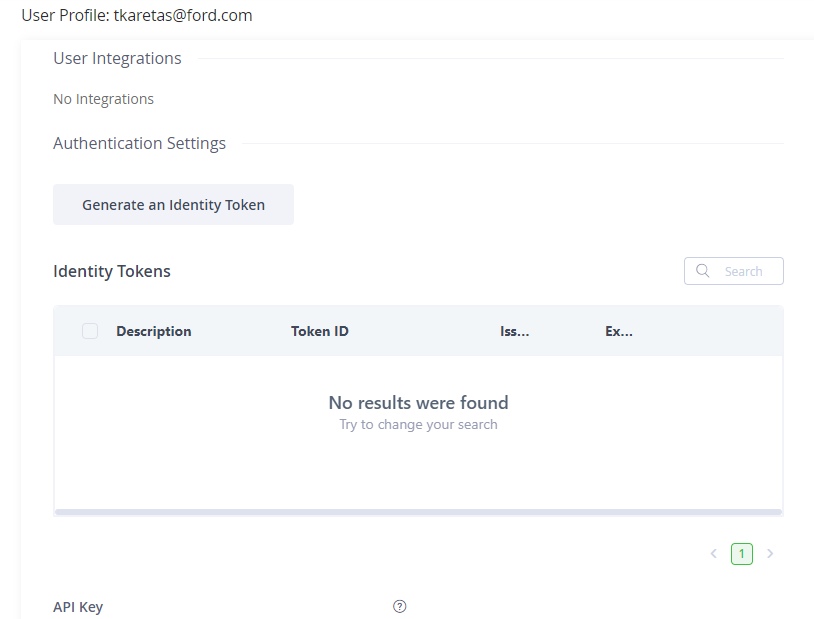
2. Generate Token
- In the profile view, locate the Authentication Settings or Identity Token section.
- Click Generate an Identity Token.
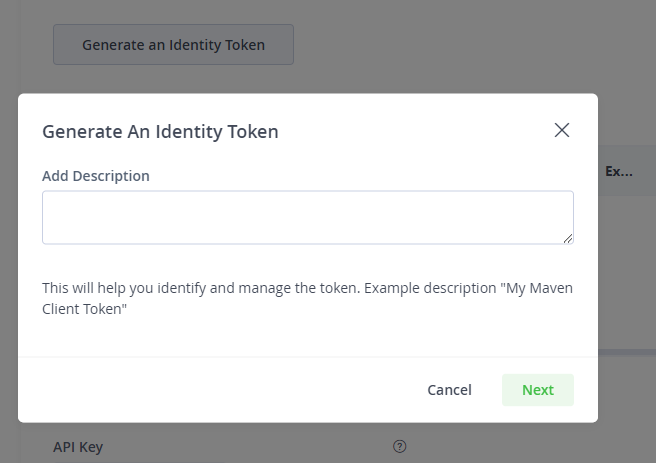
3. Configure Token
- Enter a meaningful Description (e.g., "MacBook Local Dev").
- Click Next or Generate.
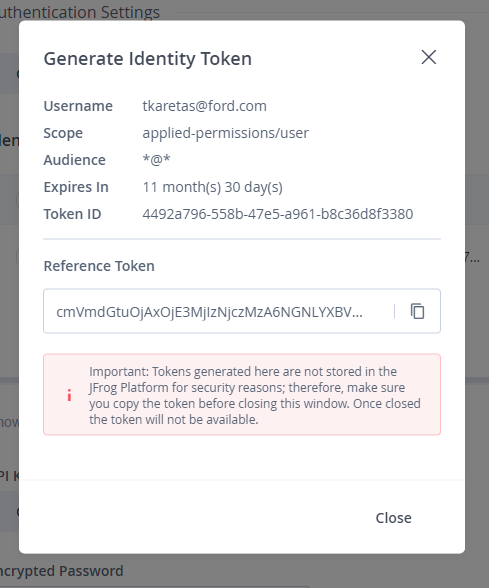
4. Save Token
- Important: Copy the generated token immediately. You will not be able to see it again once you close the window.
- Store it securely (e.g., in your password manager or environment variables).
5. Manage Tokens
- You can view and revoke existing tokens in your User Profile.

Note: Your JFrog Platform username is your full email address (e.g.,
user@ford.com), not just your CDSID.