
Appearance
Federate Repositories in the JFrog Platform
Federate Repositories
At this time, only Jfrog platform admin can federate repositories between JFrog instances. Users can request to federate their repositories through Submitting an ServiceNow ticket.
- ServiceNow Ticket format guideline:
- Repositories name:
- Source Instance: Provide URL of the source instance (Most likely will be https://jfrog.ford.com)
- Source Repository: Provide the name of the repository on the Source Instance
- Target Instance: Provide URL of the target instance ( Likely https://supplier.artifacts.ford.com )
- Target Repository: Provide the name of the repository on the Target Instance (Can have the same name as the source repository)
- Repositories name:
JFrog admins can federate using the steps below:
How to federate an existing repository
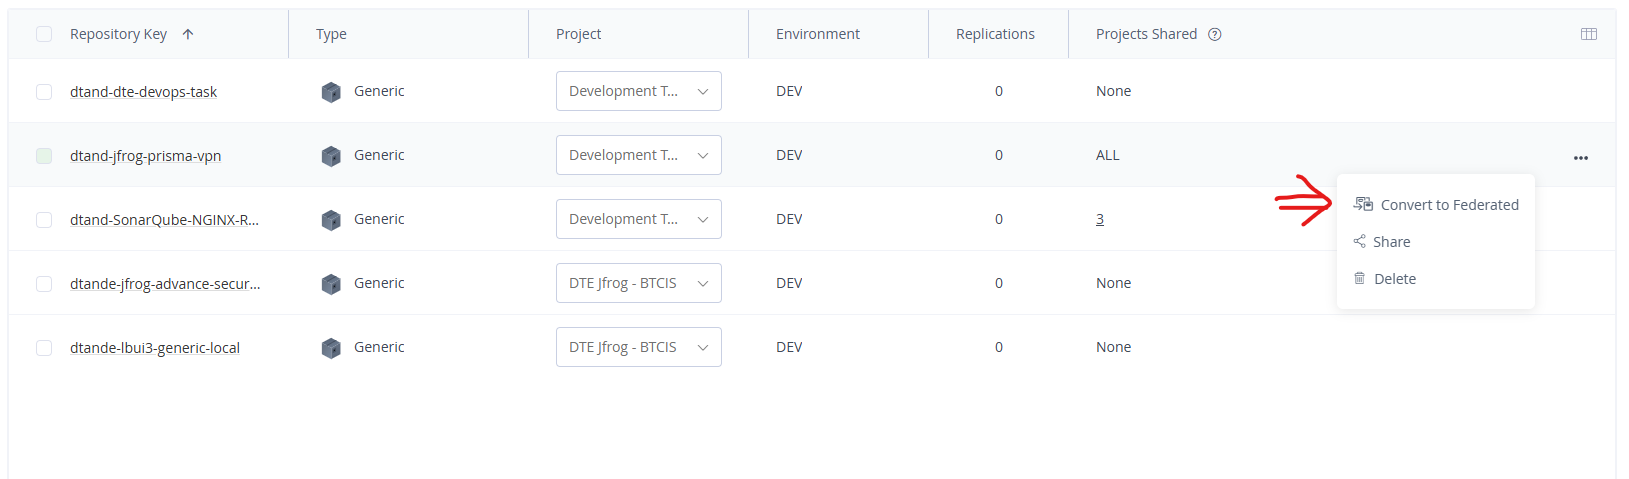
- From "Repositories" menu under "Administration", click on the three "..." option to the right of the repository and select "Convert to Federated." This can only be performed on local repositories.
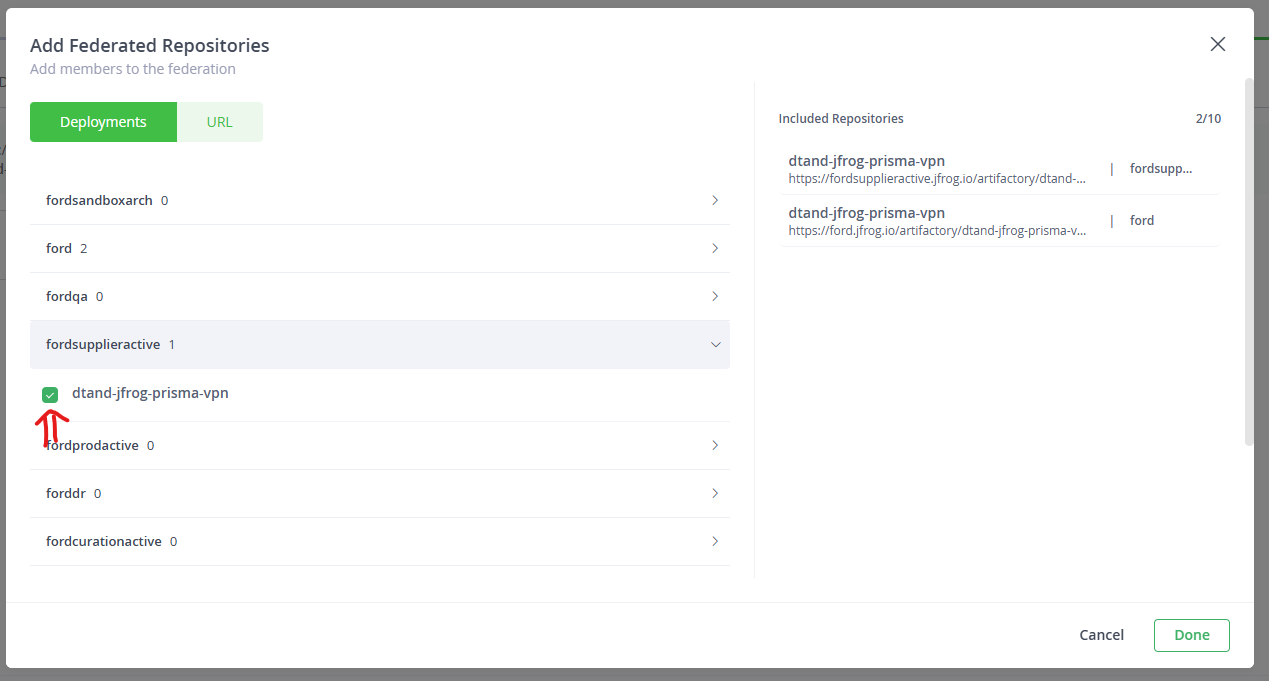
- Open the configuration for the converted repository. There should now be a "Federation" tab in it's configuration. From this tab, click on "Add Repository."

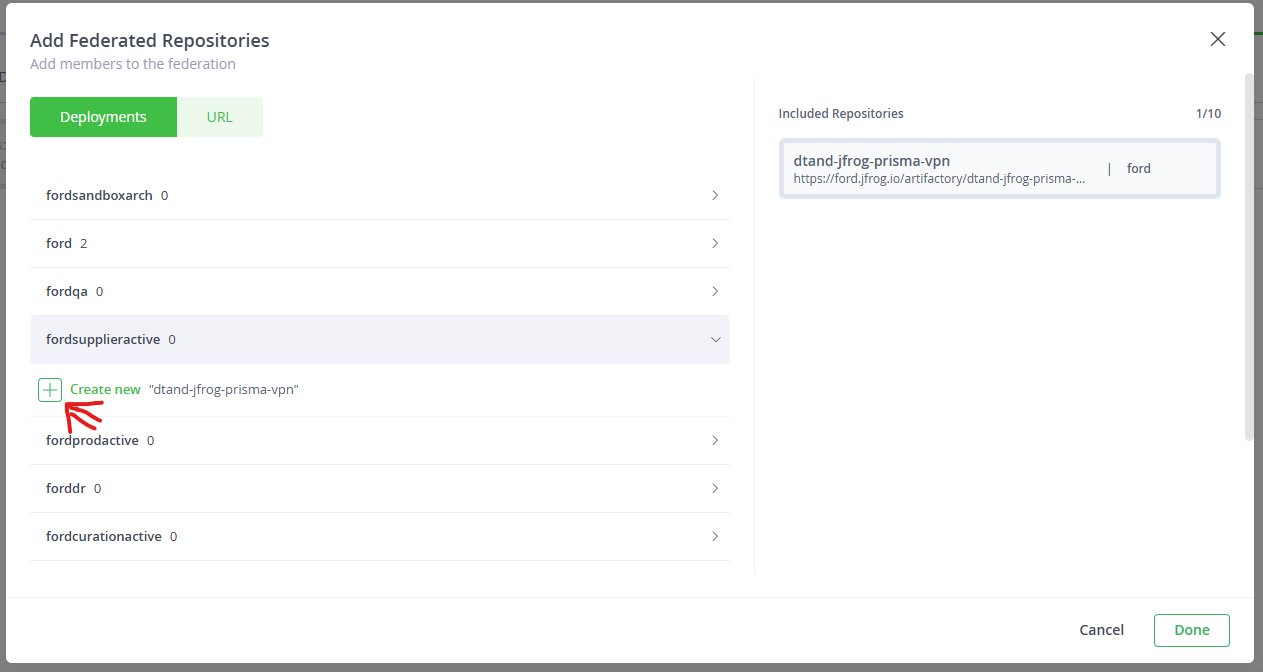
- This should provide a window "Add Federated Repositories." Select the deployment that contains the repository to add to the federation. Click on it and it should open to show existing "Federated" repositories. Click on the checkbox next to the name of the repository you want to federate. The repository will then show up in "Included repositories." Click on "Done" to save the changes to federation and "Save" to save the changes to the repository.

- If the repository does not exist already on the target instance, you can instead click on the plus sign next to "Create new ..." This will create a new repository on the target deployment with the same name as the existing repository. Afterwards, ensure that the repository has been placed as a member of the intended project, rather than just at the base level (No Project).
How to federate a new repository
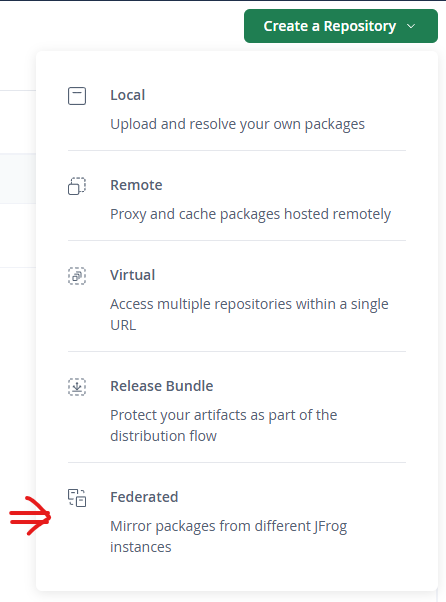
All steps to create a new federated repository are the same aside from the first step. In the case of a new repository, under the "Create a Repository" drop-down, select the "Federated" repository type. The general configuration should be the same as a local repository, with the "Federation" tab being different.
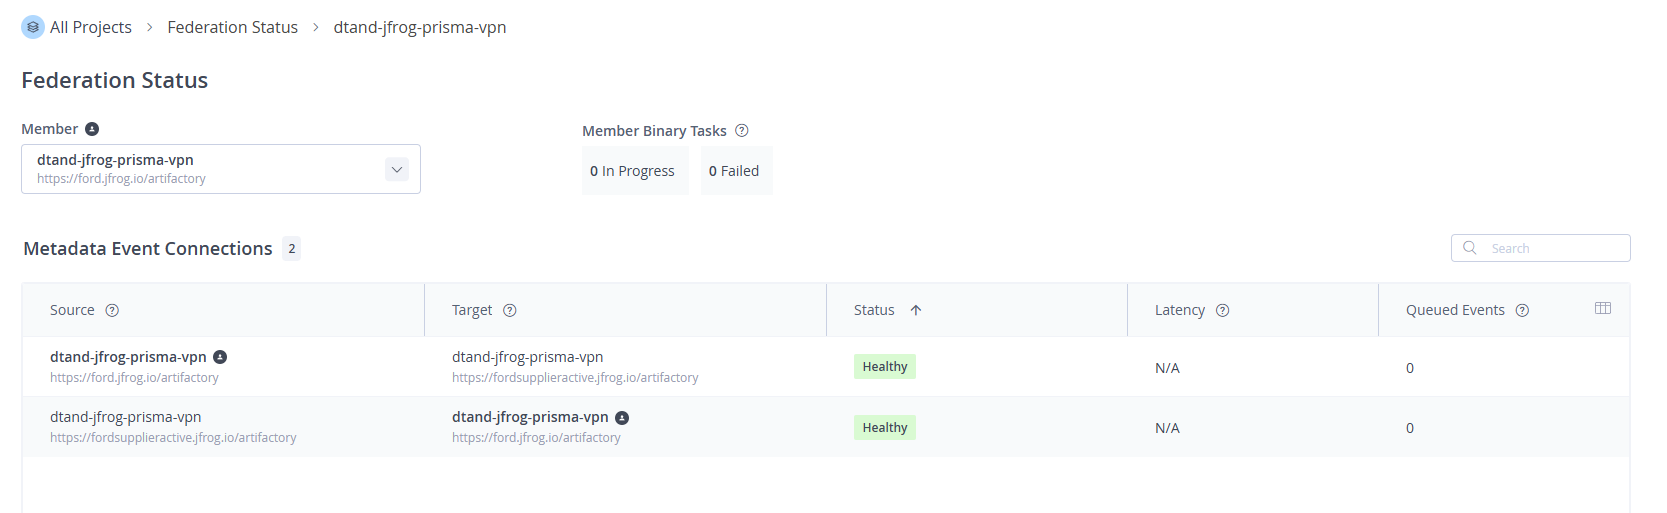
Monitor Federation
From the Administration tab, click on Monitoring->Federation Status. This will provide a general overview of the status of federated repositories in which the deployment participates.
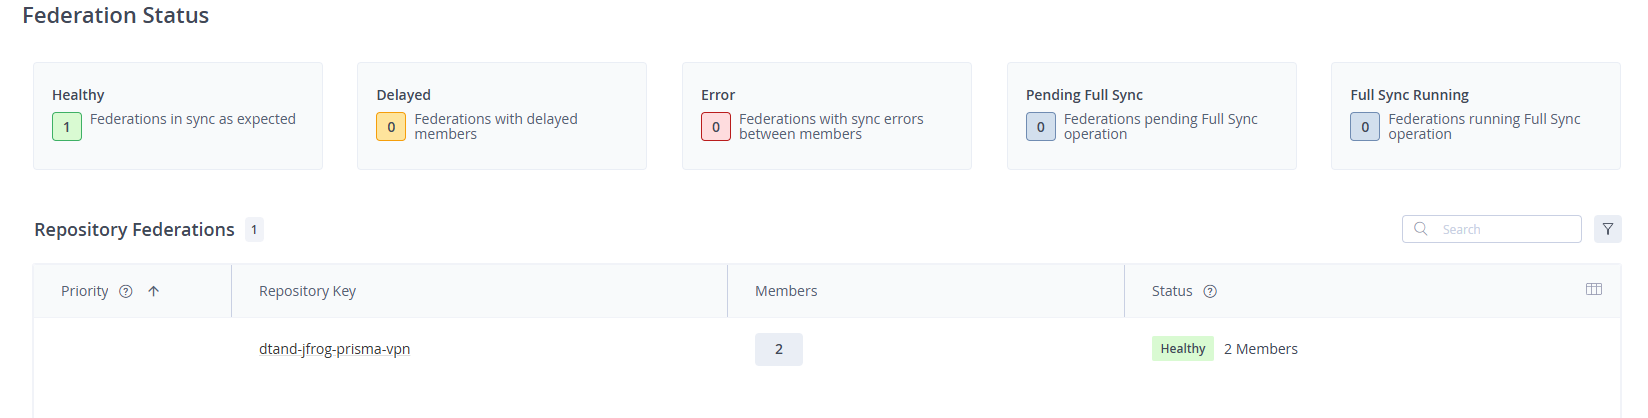
You can also look at specific federations, by clicking on the repository name.
Remove Federation
To remove a repository from federation, go to the configuration for any repository that is in the federation group. Select the "Federation" tab and click on "Add Repository." Find the instance/repository combo you want to remove, and un-check the box next to it's name. Then click "Done" on the dialog, and "Save" on the repository configuration.
Once this is done, you can also convert it back to a Local repository, by using the following curl command (replacing the data with a comma-seperated list of repositories to convert):
curl -H "Authorization: Bearer $JFROG_PROD_TOKEN" -X POST https://jfrog.ford.com/artifactory/api/federation/convertToLocal --header 'Content-Type: application/json' --data '["dtand-jfrog-prisma-vpn"]'